To manage outgoing calls, go to ’Telephony’ → ’VPBX’ tab → ’Numbering Plan’ in the left-hand menu → 'Subscriber Numbers'.
Select the subscriber and click ’Edit’.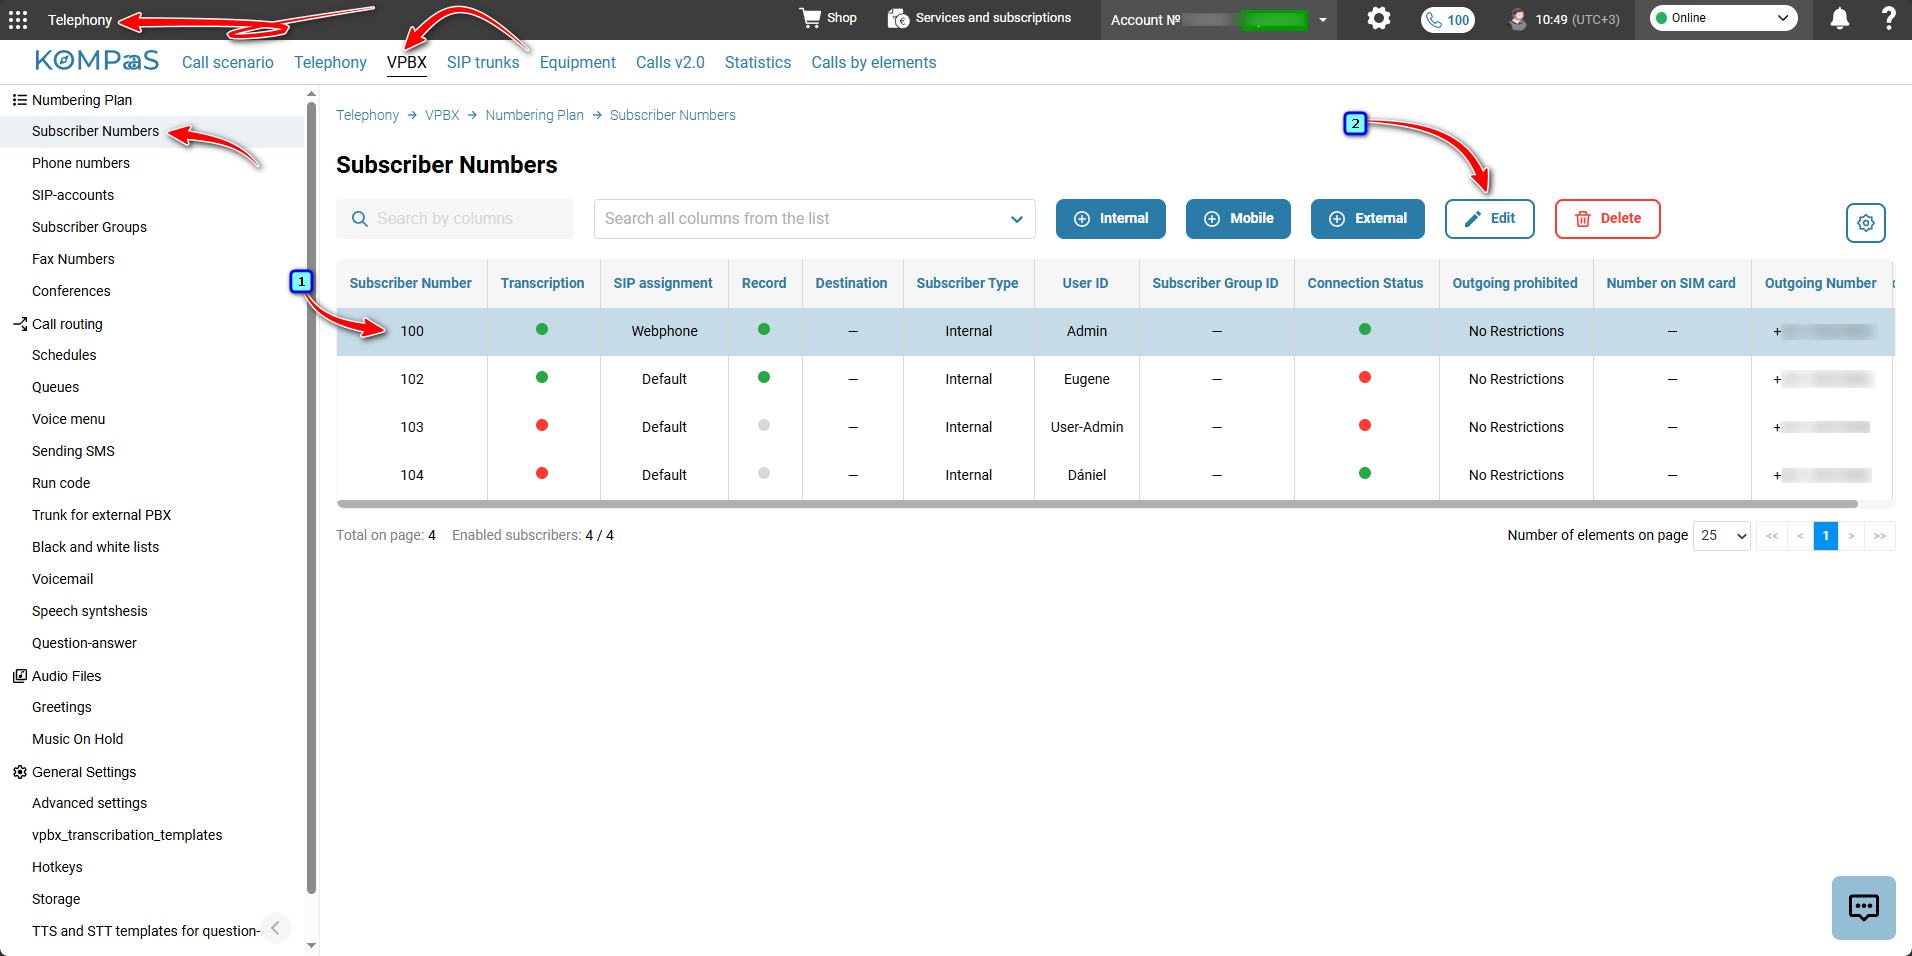
In the subscriber editing modal window, on the ’Subscriber’ tab, configure the parameters depending on the subscriber type:
Type of SIP account (the option is not available for an external subscriber) — select the SIP account type when creating a subscriber to be used for this subscriber. For more information, see 'SIP Account Types';
Route outgoing calls through — VPBX subscriber number;
User — an employee with access to the VPBX interface. For more information, see 'Virtual PBX user';
Comment — your comment;
Subscriber Group — select the group whose settings will be applied to the subscriber. For more information, see 'Subscriber groups';
Record all calls — select the checkbox to enable recording. For more information, see 'Call recording';
Transcribe calls — select the checkbox to enable the option. The option is available in the 'Webhooks' section — ’Transcription completion’, ’Contact Center sub-dialog completion’ or in ’AI Contact Center’;
Call Monitoring (Prompt) — select the checkbox so that an experienced employee can listen to a new employee's conversation with a customer and provide guidance over a parallel line. For more information, see 'Call shadowing (Promter)';
Do not intercept incoming calls — select a number;
Autoselect (*the option is not available for an external subscriber) — select an option if required:
By Region — for more information, see 'Autoselect by Region'. To enable the option, see ‘How to enable ‘Automatic number change (GEO)’.
⚠️Attention!
The option must be enabled both for the subscriber and for the phone numbers involved in routing. See 'Phone numbers'. If the option is not enabled in the phone number settings, that number will not be used for automatic selection based on the region of the called number.
Carousel — for more information, see ‘Carousel’. To enable the ’Carousel’ option, contact your manager.
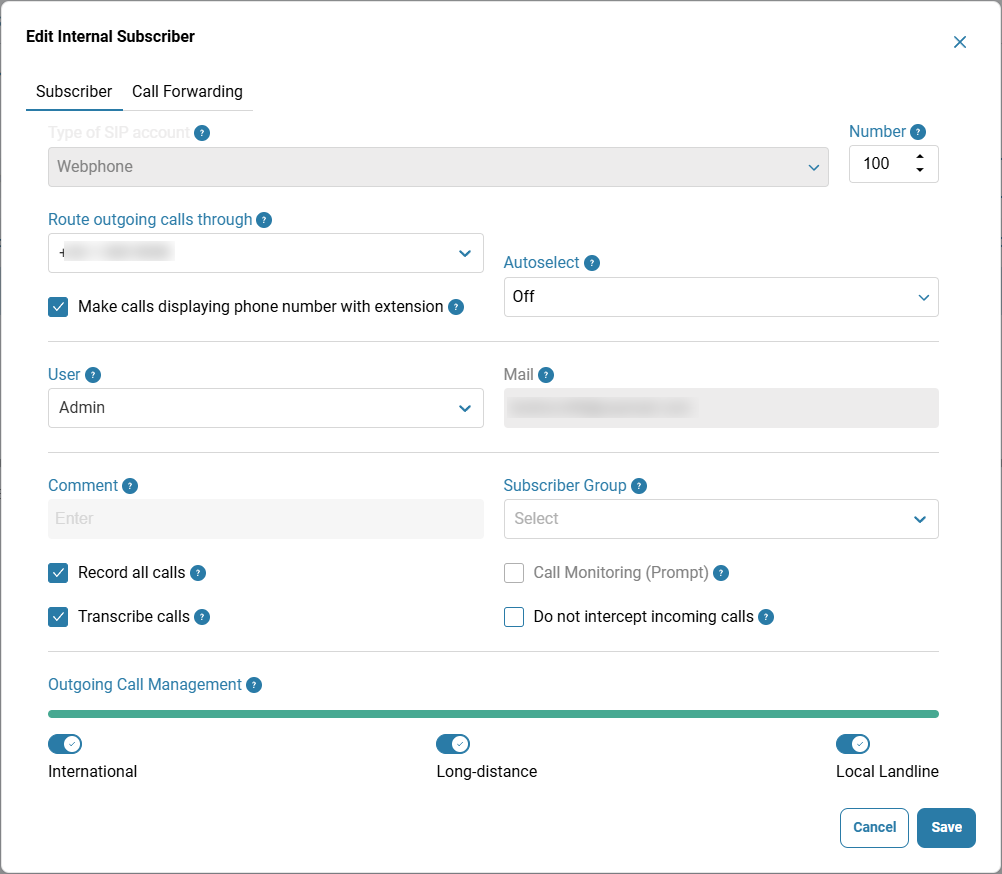
Outgoing Call Management (*the option is not available for an external subscriber) — to block calls to a specific destination for the subscriber, click the corresponding entry.
⚠️Attention!
For the subscriber to make calls to allowed destinations, these destinations must also be enabled on the phone number through which the call is made. See 'Phone numbers'.
- International — international outgoing calls are disabled;
- Long-distance — international and long-distance outgoing calls are disabled;
- Local Landline — all outgoing calls except internal calls are disabled.
After configuring the settings, click ’Save’.
See also:
DID numbers routing Configuration
Was this article helpful?
That’s Great!
Thank you for your feedback
Sorry! We couldn't be helpful
Thank you for your feedback
Feedback sent
We appreciate your effort and will try to fix the article